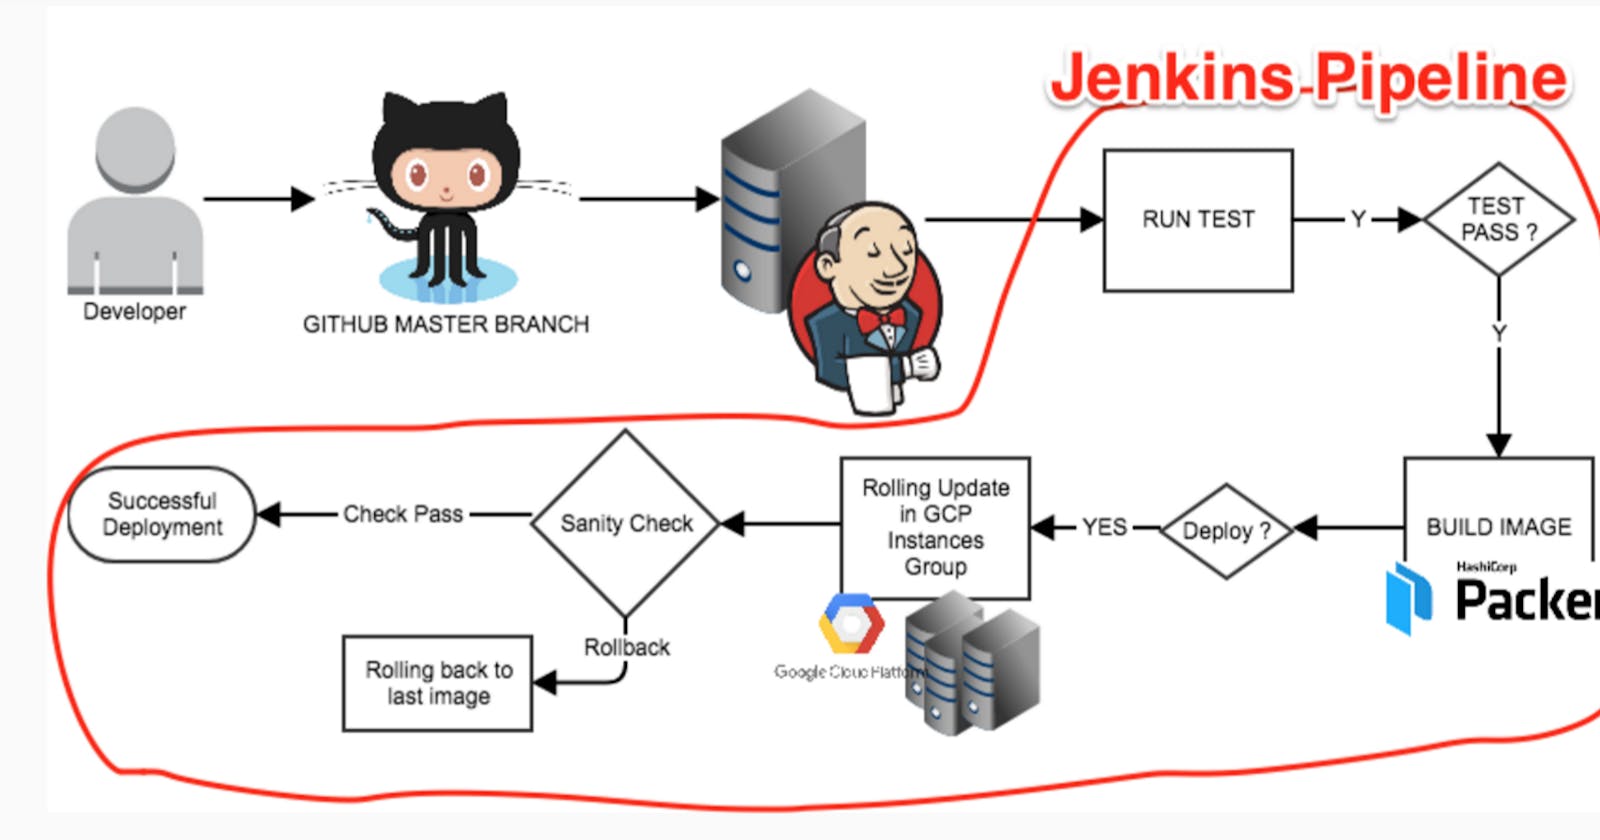
JenKins demo turorial
1.1. What is Jenkins?
Jenkins is a popular open source tool to perform continuous integration and build automation. Jenkins allows to execute a predefined list of steps, e.g. to compile Java source code and build a JAR from the resulting classes. The trigger for this execution can be time or event based.
For example, you can compile your Java based application every 20 minutes or after a new commit in the related Git repository.
Possible steps executed by Jenkins are for example:
perform a software build using a build system like Apache Maven or Gradle
execute a shell script
archive a build result
run software tests
Jenkins monitors the execution of the steps and allows to stop the process, if one of the steps fails. Jenkins can also send out notifications in case of a build success or failure.
Jenkins can be extended by additional plug-ins. For example, you can install plug-ins to support building and testing Android applications.
1.2. Using continues integration
Continuous integration is a process in which all development work is integrated as early as possible. The resulting artifacts are automatically created and tested. This process allows to identify errors in an early stage of the project.
The Jenkins build server is a tool to provide this functionality.
2. Installation and setup of Jenkins
For most platforms you have native packages, see the Jenkins Homepage.
2.1. Installing the Jenkins server on Ubuntu
Jenkins provides Debian/Ubuntu packages which install Jenkins and register Jenkins as start service. See the Install Jenkins on Ubuntu description. The Linux installation creates a /etc/init.d/jenkins script which starts Jenkins automatically at boot time.
Jenkins stores all the settings, logs and build artifacts in its home directory. The default installation directory under Ubuntu is /var/lib/jenkins.
2.2. Installation of Jenkins in a Docker container
COPY
COPY
docker pull jenkins/jenkins:lts

# list images, jenkins should be available
docker images
docker ps will not show a running container, as we did not yet start it. Start an instance of Jenkins with the following command:
COPY
COPY
docker run -p 8080:8080 -p 50000:50000 -v [yourjenkinshome]:/var/jenkins_home jenkins/jenkins:lts
Replace [yourjenkinshome] with a path fitting for you, e.g. /home/vogella/jenkins_home.
For example, on Windows:
COPY
COPY
docker run -u 0 -p 8082:8080 -p 50002:50000 -v //C/Users/Lars/jenkins:/var/jenkins_home jenkins/jenkins:lts
On Linux / Mac you may have to see the permission for the Docker user (default 1000) to modfiy the file system |
Windows |
See hub.docker.com/r/jenkins/jenkins
If you need other tools installed, you can create your own Docker file with the necessary tooling installed. For example the following creates a new image based on Jenkins with Maven installed.
Create a new directory
Create a file called
Dockerfilewith the following content:
COPY
COPY
FROM jenkins/jenkins:lts
# if we want to install via apt
USER root
RUN apt-get update && apt-get install -y maven
# drop back to the regular jenkins user - good practice
USER jenkins
- Create a new image with your Dockerfile
COPY
COPY
docker build -t jenkins-maven .
Now you can start your new image jenkins-maven-latest.
COPY
COPY
docker run -u 0 -p 8082:8080 -p 50002:50000 -v //C/Users/Lars/jenkins:/var/jenkins_home jenkins-maven:latest
All the configuration and jobs will be stores in your user defined directory.
2.2.1. Using the .war file to start Jenkins
Download the jenkins.war file from the Jenkins Homepage. From this file you can start Jenkins directly via the command line with java -jar jenkins*.war.
If you start it locally, you find it running under the following URL: localhost:8080
To run it in your Tomcat server, put the .war file into the webapps directory. If you start Tomcat, your Jenkins installation will be available under
COPY
COPY
http://localhost:8080/jenkins
If the jenkins.war is deployed in your webapps directory, but can not be started and the tomcat manager says FAIL - Application at context path /jenkins could not be started, you may need to grant the permissions for |
3. Configure Jenkins
3.1. Connect to Jenkins for the initial configuration
After installation, open a browser and connect to it. The default port of Jenkins is :8080, therefore on your local machine you find it under the following URL:
COPY
COPY
http://localhost:8080/
You will need to copy the initial password from the file system of the server.
Afterwards you can select to install Plugins. Select the Install suggested Plugins to get a typical configuration.
Create an admin user and press Save and Finish.
3.2. User management Jenkins
Select Manage Jenkins and then Configure Global Security. Select the Enable security flag. The easiest way is to use Jenkins own user database. Create at least the user "Anonymous" with read access. Also create entries for the users you want to add in the next step.
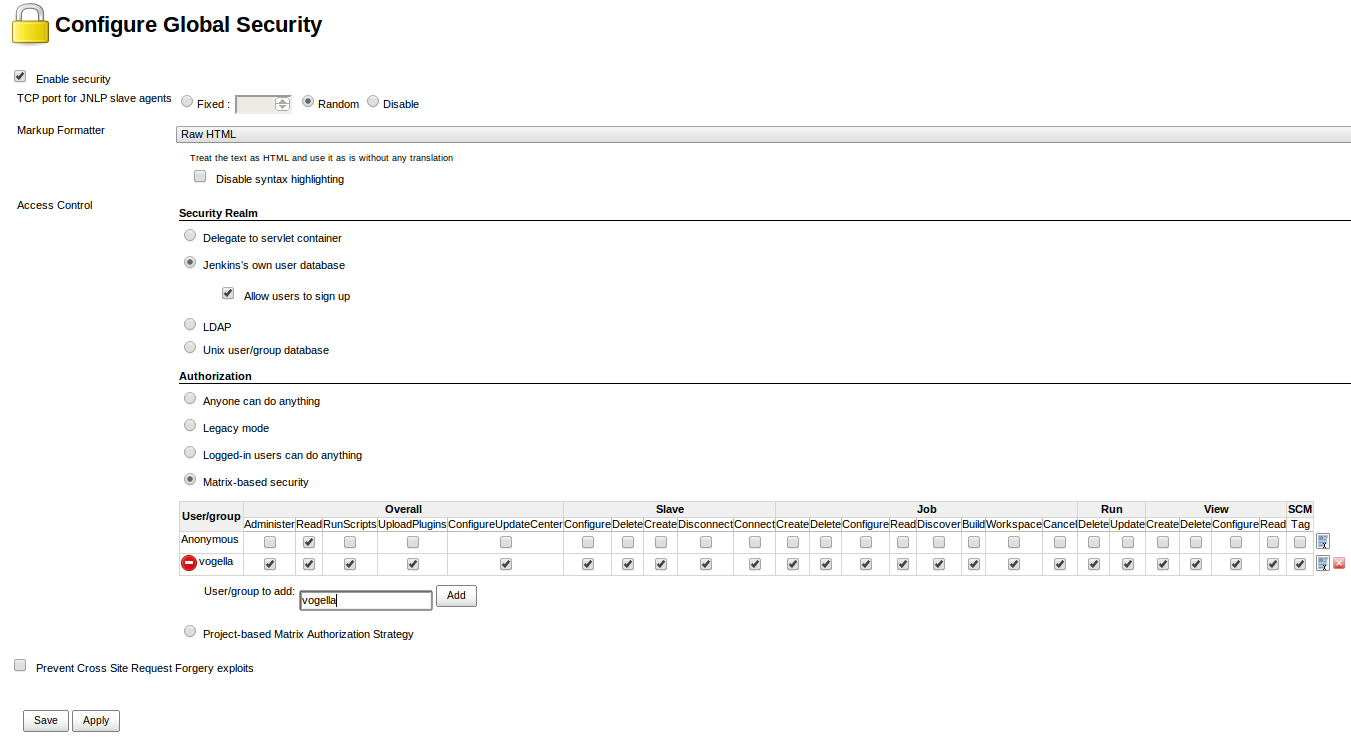
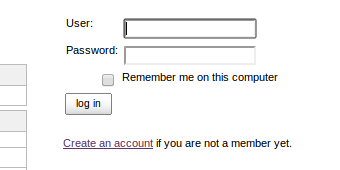
On the login page, select Create an account to create the users you just gave access.
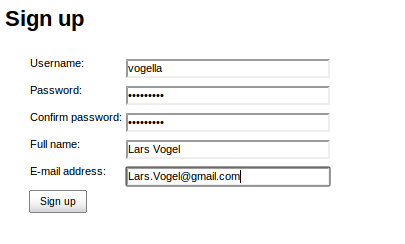
3.3. Assign roles to users
If you want to create a role based authorization Strategy you first need to install the Role-based Authorization Strategy Plugin. Go to Manage Jenkins Manage Plugins Available enter Role-based Authorization Strategy in the filter box and select and install the Plugin. To see a list of commonly used Plugins go to Plugin management.
Now go to Manage Jenkins Manage and Assign Roles Assign Roles to grant users additional access rights.

Navigate to Manage Roles to define access restrictions in detail. Pattern is a regex value of the job name. The following grants unregistered users read-only access to your build jobs that start with the L-, C-, I- or M- and only those.

3.4. Generate ssh key for Jenkins user
If you want to access a private Git repo, for example at GitHub, you need to generate an ssh key-pair. Create a SSH key with the following command.
COPY
COPY
sudo -u jenkins ssh-keygen
The public key must be uploaded to the service you are using, e.g., GitHub.
3.5. Configure the default port of the Jenkins build server
The default port number can be changed in the config file at
COPY
COPY
sudo vim /etc/default/jenkins
Here you can set a different port number, e.g. HTTP_PORT=8082
Now you need to restart Jenkins with
COPY
COPY
service jenkins restart
or by adding /restart at the end of the Jenkins URL, e.g. yourjenkinsurl/ci/restart.
4. Setting up a Jenkins job
The build of a project is handled via jobs in Jenkins. Select New Item. Afterwards, enter a name for the job and select Freestyle project and press OK.
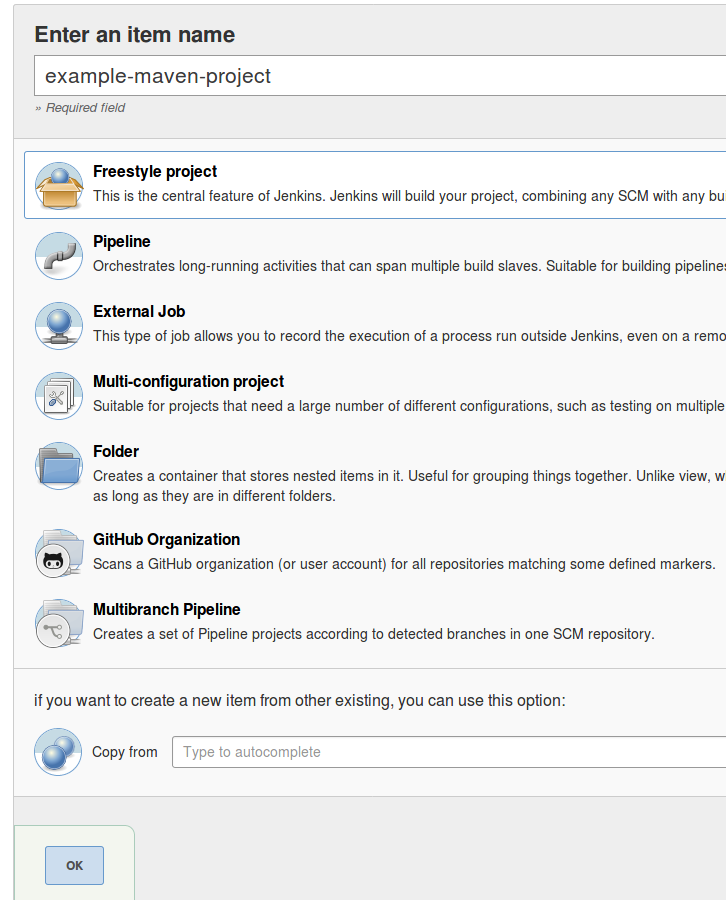
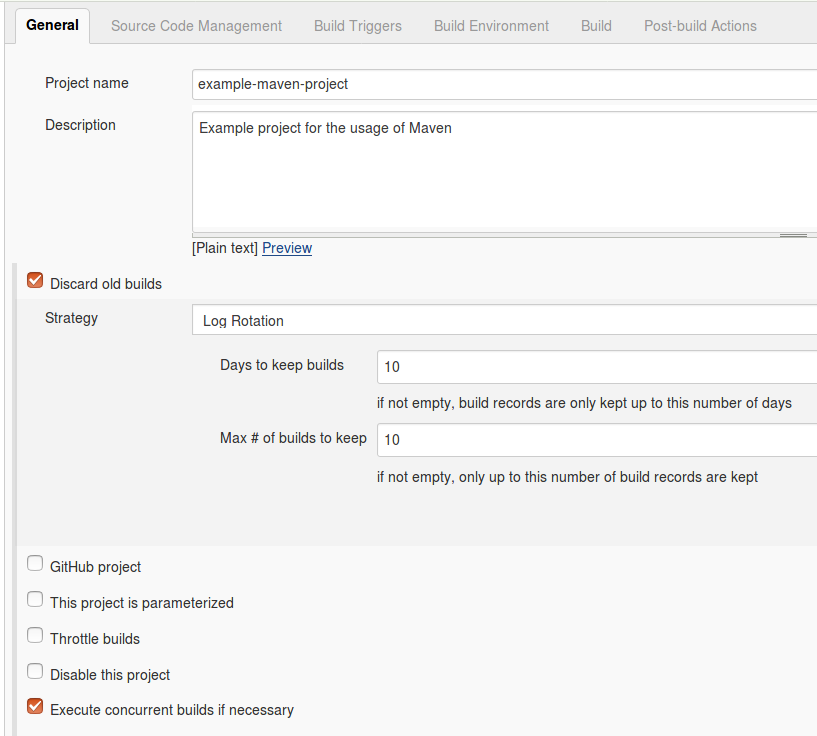
Enter a description for the job (project name) and configure how many builds should be retained and for how long.
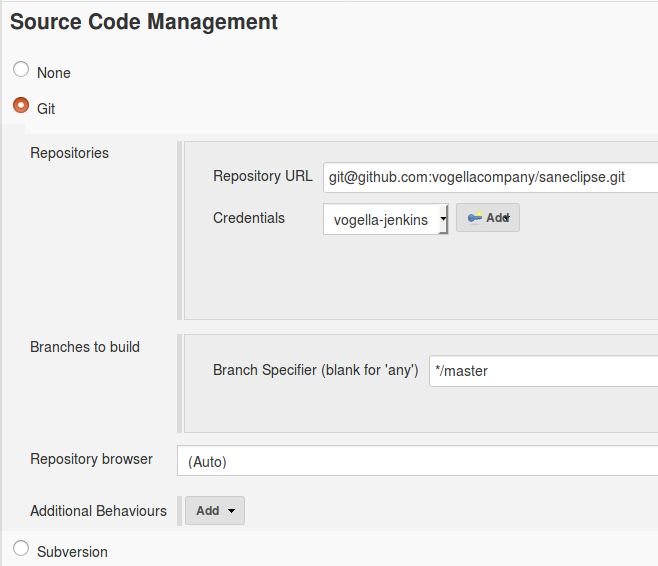
Configure how the source code can be retrieved. If you are for example using Git, enter the URL to the Git repository. If the repository is not public, you may also need to configure the credentials.
Specify when and how your build should be triggered. The following example polls the Git repository every 15 min. It triggers a build, if something has changed in the repo.
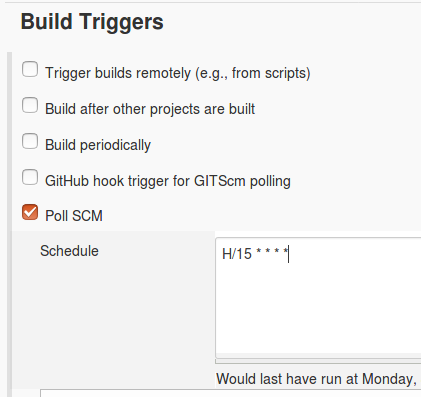
To trigger a build after a commit on the Git repository, select GitHub hook trigger for GITScm polling instead of Poll SCM.
If you want an automatic build after a commit you must also configure the Jenkins URL on the Git Repository. For details on how to do this with GitHub see our GitHub tutorial. |
If you want to delete the workspace before a build to avoid any side-effects, you can add a build step in the Build section.
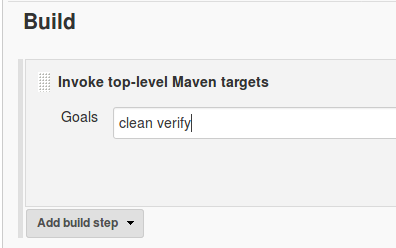
Press Save to finish the job definition. Press Build Now on the job page to validate that the job works as expected.
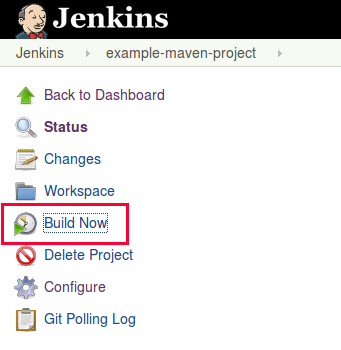
After a while the job should go to green or blue (depending on your configuration), if successful. Click on the job and afterwards on Console Output to see the log file. Here you can analyze the build errors.
5. Build Pipelines
Jenkins pipelines help you align the build process of a project. This is done by specifying tasks and the order in which they are executed. There are all kinds of possible tasks that a Jenkins pipeline can do for you. For example, build assets, send an email on error, send the build artifacts via SSH to your application server, etc.
5.1. Setup of Pipelines
Jenkins allows ypu to specify pipelines using a Jenkinsfile. This is just a textfile that contains the necessary data for Jenkins to execute the pipeline. It is called Jenkinsfile (notice: no file extension) and should be placed in the root of your project.
This file should be checked into version control as it is needed on your Jenkins instance. |
Jenkins supports two different syntaxes.
Declarative (since Pipeline version 2.5)
Scripted
For this tutorial we will focus on the declarative approach.
The following example shows a pipeline with 2 stages:
COPY
COPY
pipeline {
    agent any

    stages {
        stage('Build Assets') {
            agent any
            steps {
                echo 'Building Assets...'
            }
        }
        stage('Test') {
            agent any
            steps {
                echo 'Testing stuff...'
            }
        }
    }
}
The |
5.2. Setup using the Blue Ocean Plugin
The above process can also be done using the Blue Ocean Jenkins Plugin.
5.2.1. Installation
To install the Plugin go to Manage Jenkins Manage Plugins Available and select the Blue Ocean Plugin.
After the installation is finished you have an additional menu entry called Open Blue Ocean in your main Jenkins navigation.
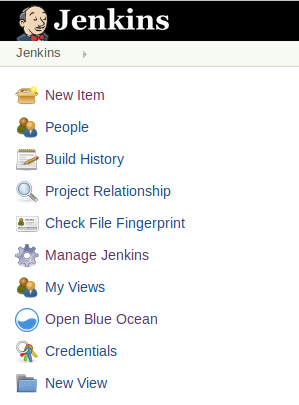
5.2.2. Creating a new Pipeline
Click on New Pipeline to create a new Pipeline.

Select your version control provider.
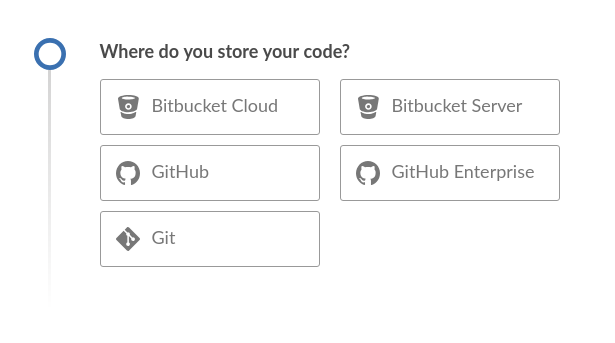
For this example we will use a GitHub repository. |
Depending on your provider you will need to pass some kind of credentials.
GitHub provides the ability to generate access-tokens that applications can use to access the platform with your user. You can also restrict what the access-token can do. |
The Blue Ocean application will provide a link to the GitHub page you need to visit. The necessary permissions that Blue Ocean needs to operate are already selected. Add a description and click on Generate Token at the bottom of the page.
Copy the generated token and paste it in the Blue Ocean mask.
Select the account the repository belongs to and select the repository.
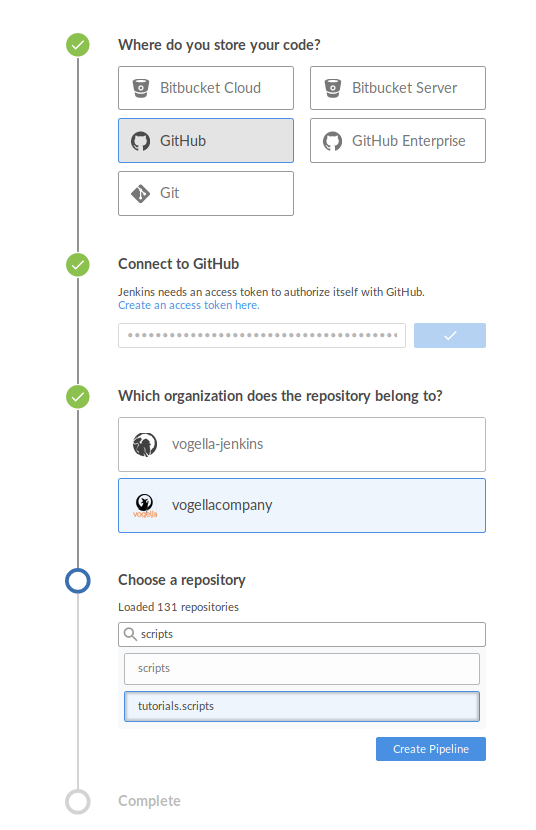
If you already have a Jenkinsfile with pipelines in the repository it will show up in the last step. If not, Blue Ocean will offer to create one for you.
5.2.3. Adding steps to your Pipeline
In the next screen you will see a visual representation of your Pipeline. Here you can add or remove steps.

To create a new step click on + in the canvas. A menu will open on the right that lets you specify a name and what steps you want to perform.
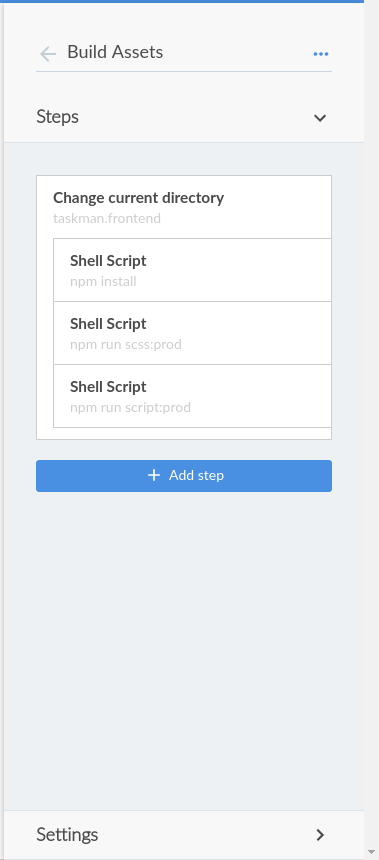
After you have finished editing the Pipeline Blue Ocean will offer you to commit the newly created pipeline to your repository.
Under the hood Blue Ocean only created a valid Jenkinsfile to be used by Jenkins.
After committing Jenkins will build the project using the newly modified Pipelines.
6. Jenkins management
6.1. Plugin management
Jenkins can be extended via additional Plugins with more functionality. You can configure your Plugins via the Manage Jenkins Manager Plugins link.
To install Plugins in Jenkins select the Manage Jenkins Manager Plugins link and search for the Plugin you want to install. Select it from the list and select to install it and restart Jenkins.
The following table is a summary of commonly used Plugins.
Table 1. Jenkins Plugins | ||
Plug-in name | Description | URL |
|---|---|---|
Git Plugin | This Plugin allows to use Git as a build SCM. | |
Xvnc Plugin | This Plugin allows projects to run xvnc during a build. This allows for example to run tests which require a display to run on a virtual display. To use this Plugin you need to connect once to your vncserver on the command line to provide a password. Use for example the following commands. | |
Gradle Plugin | This Plugin allows to run Gradle builds, e.g., as required for Android, via Jenkins. | |
Maven Plugin | This Plugin allows to run Maven builds. | |
GitHub Plugin | This Plugin integrates Jenkins with Github projects. | |
Publish Over SSH Plugin | This Plugin allows to publish build artifacts via ssh | |
Workspace Cleanup Plugin | This Plugin allows to delete the workspace before the build or when a build is finished and artifacts are saved. | |
Github Pull Request Builder | This Plugin allows to build GitHub Pull Requests |
6.2. Restart your Jenkins
After installing Plugins you will need to restart Jenkins. You can do so by adding restart as URL parameter,
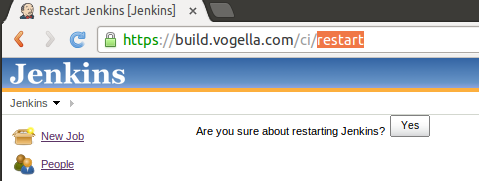
or with the following command:
COPY
COPY
service jenkins restart
I am Yogesh V. Lale, Please do follow me here and support #devOps #trainwithBhupendarRajput #github #devopscommunity #devops #cloud #devoparticles #technicalGuftgu